In short
- Turn the paper so the long side is vertical. The first character goes in the upper half, the second in the lower half, both centered on the vertical center line.
- Fold the sheet lightly in half both ways for guide lines, leave margins all around, and sign on the left, in the lower part, with the small brush.
- Write the simpler character a little smaller and the complex one a little larger, keep a steady rhythm, and look at the sheet from a distance.
- Large brush
- Small brush
- Ink
- Hanshi
- Felt pad
- A printed model
Folding guide lines and the layout
Many students make soft folds in the paper before writing. The creases give you the center line and the boundary between the two characters.
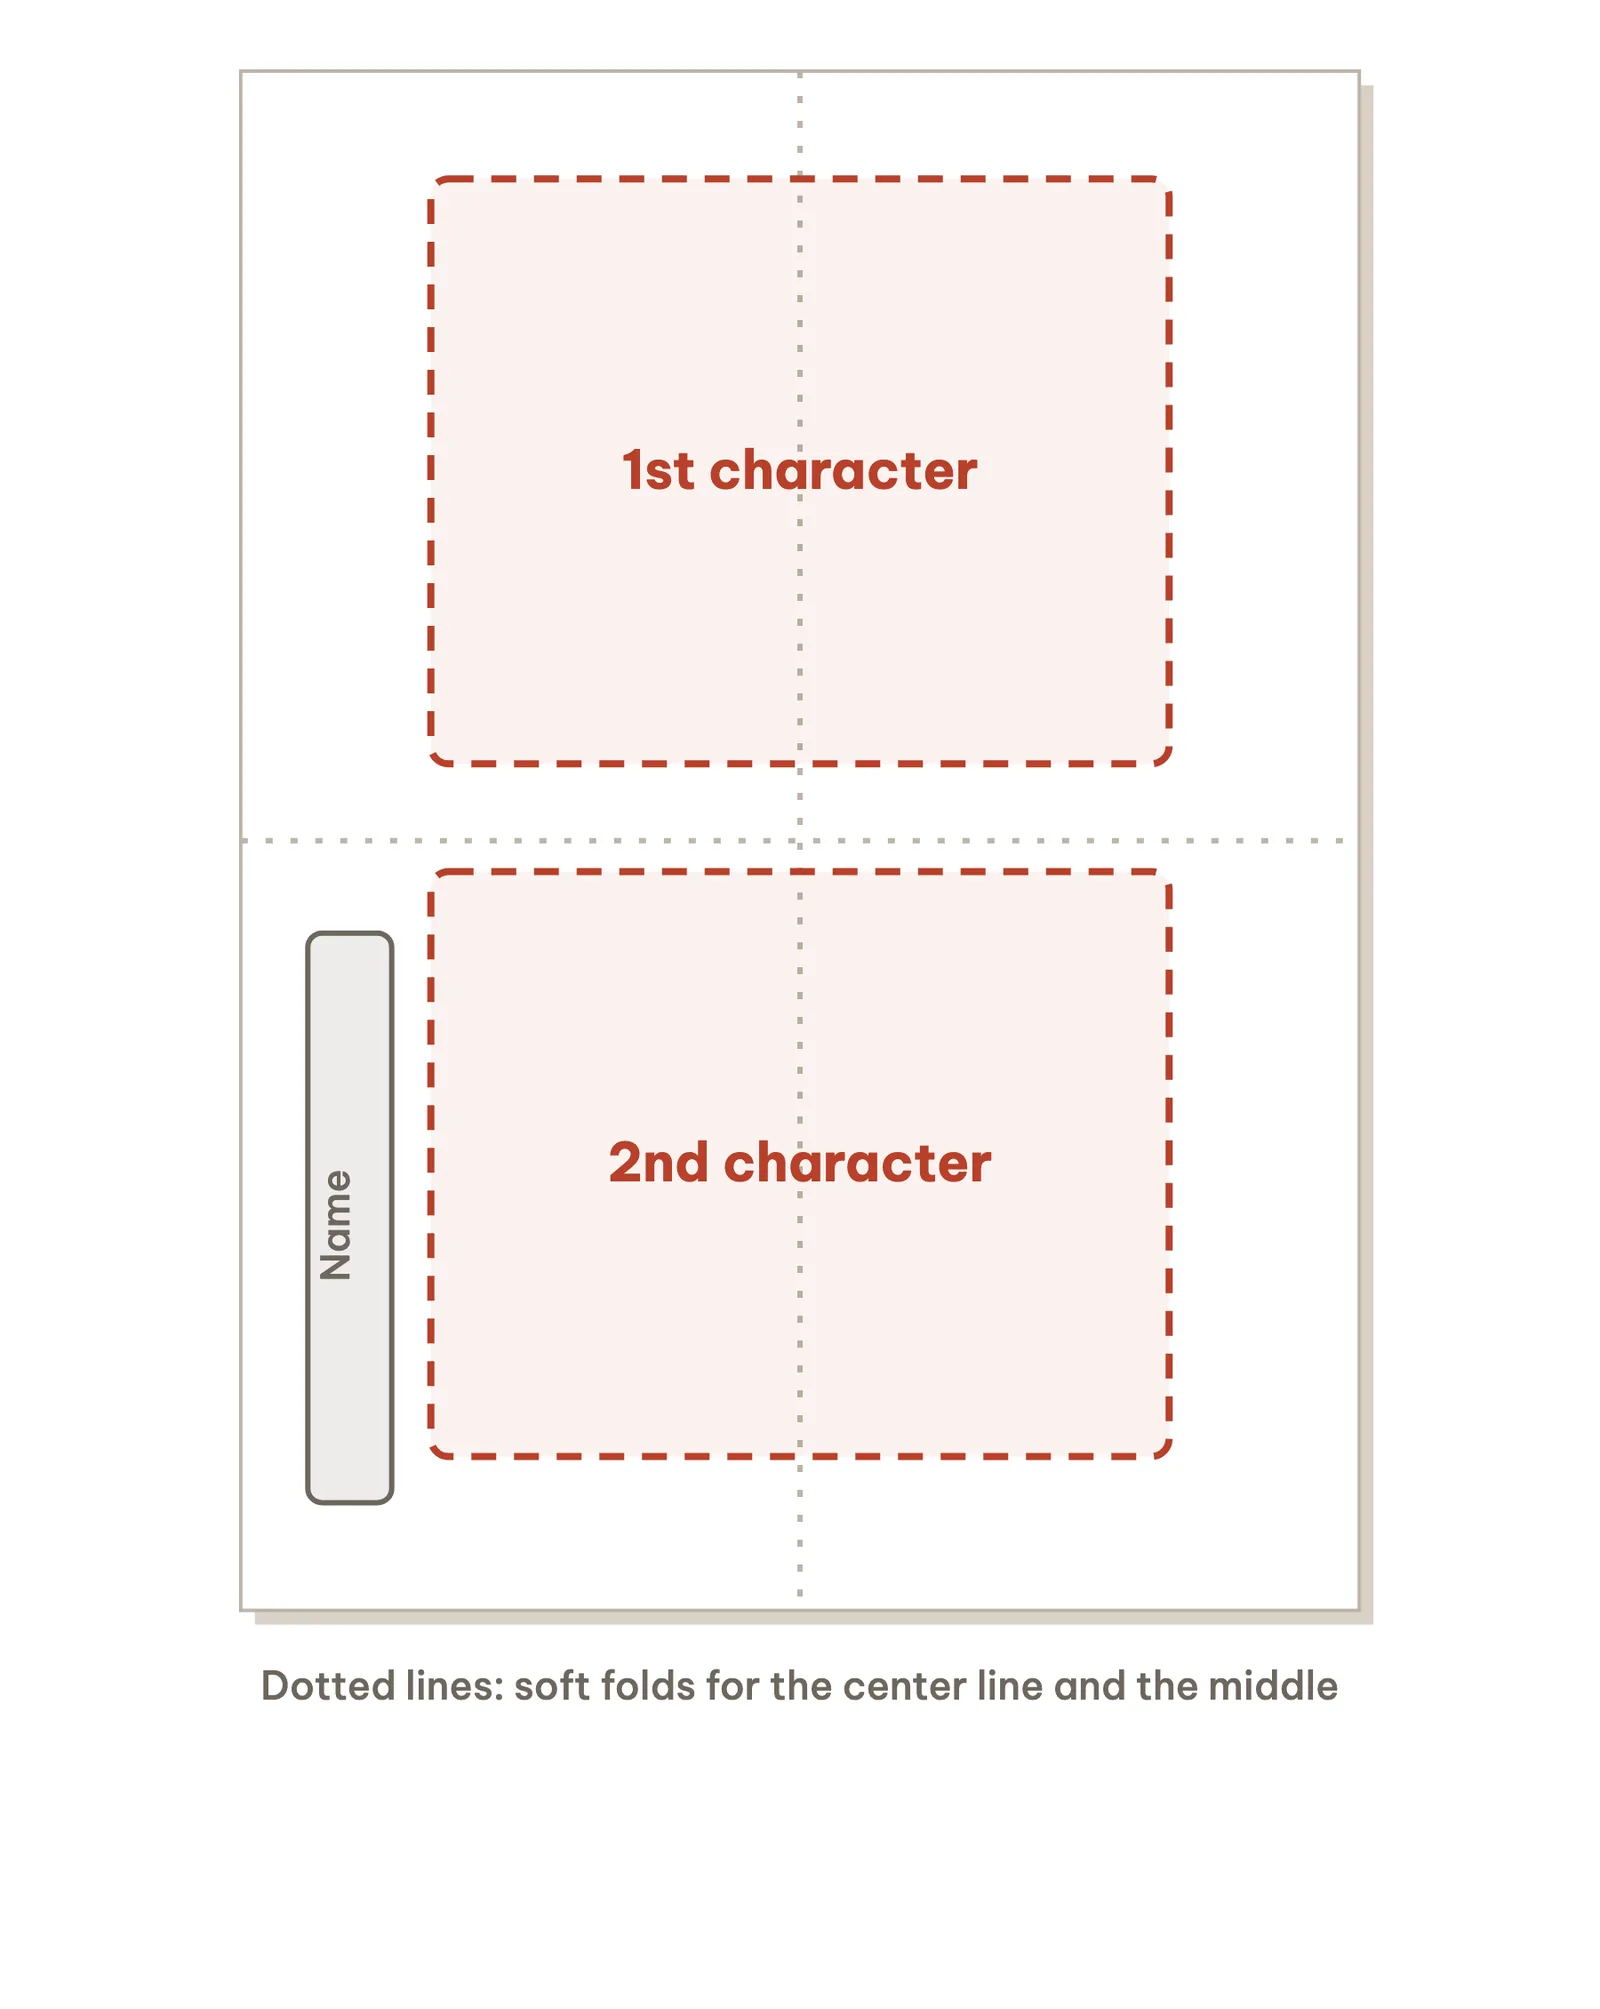
- Turn the hanshi 半紙 so the long side is vertical
- Fold it in half lengthwise, and open it
This gives you the vertical center line.
- Fold it in half the other way
This marks the boundary between the two characters. Some teachers have students fold the paper into eight sections for more guide lines.
- Keep the folds light, and write on the smooth side
The creases are only a gentle guide. A felt pad printed with grid lines does a similar job.
- First character in the upper half, second in the lower half
Japanese is written from top to bottom. When writing more lines, lines go from right to left.
- Center each character, and leave margins
Center each character on the vertical center line. The characters should fill the paper generously, but not touch the edges at the top, bottom, or sides.
- Your name goes on the left, in the lower part
Written smaller, with the small brush.
Writing a two-character word
- Load the brush for the first character
Full to the root, tip in a neat point. See ink and loading the brush.
- Write the first character in the upper half
Try not to stop and stare in the middle of a character.
- Reload, and write the second character in the lower half
Load the brush once for each character, and keep a steady rhythm.
- Sign your name on the left with the small brush
In a single vertical line, starting a little below the level of the top of the second character.
- Stand up and look at the sheet from a little distance
Balance is often easier to see from farther away.
- Write the word five times, and keep the best sheet
Compare each sheet with the model. That best sheet is your first work of shodo.
Balance between two characters
- The two characters look the same size. A character with few strokes, like 大, looks bigger than its size, and a character with many strokes looks smaller. So write the simpler character a little smaller and the more complex one a little larger. Compare 大 and 空 in the model for 大空.
- Each one sits on the center line, with margins all around.
- The rhythm was steady: load, write, reload, write, without stopping mid-character.
- You looked at the whole sheet from a little distance.
Sixteen model words to practice
These sixteen words were written by the calligraphy teachers of Kodomo School, the same kind of models our students copy in class. Each one has a free practice sheet to print, with the meaning of the word, the number of strokes in each character, and three points our teachers want you to notice.
- Start with the easier words
大空, 平和, 元気, and 花火 have fewer strokes, and three of them use characters from your first characters (大, 平, and 火). Words like 感謝 and 笑顔 have many strokes and are better saved for later.
- Put the printed sheet beside your paper
To the left, or to the right if you are left-handed, so you can glance at the model often.
- Read the three points before you write
Then write the word, compare, and choose one point to focus on for the next sheet.
- Practice the hard character on its own
If one character in a word gives you trouble, write it alone on a half sheet a few times, then return to the full word.
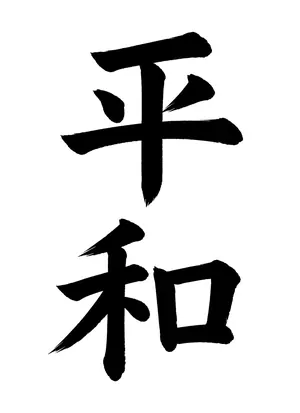 Peace平和 · heiwa
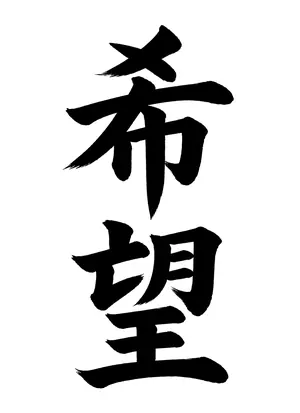 Hope希望 · kibō
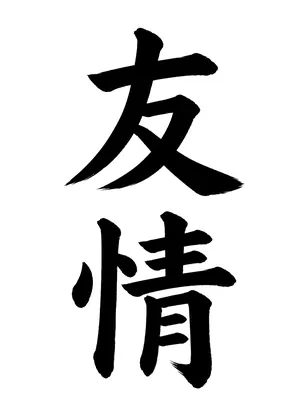 Friendship友情 · yūjō
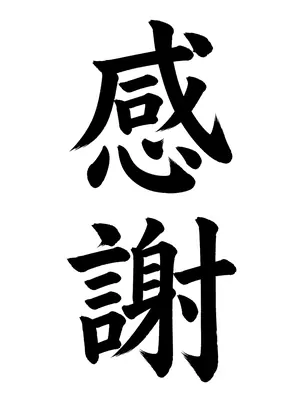 Gratitude感謝 · kansha
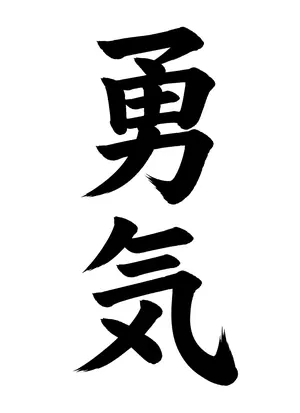 Courage勇気 · yūki
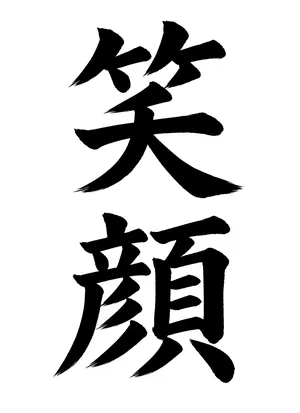 Smile笑顔 · egao
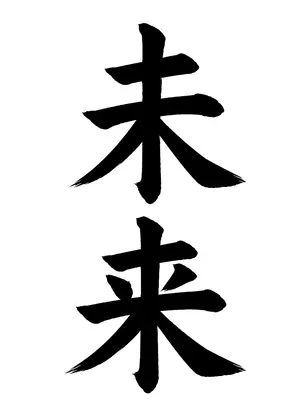 Future未来 · mirai
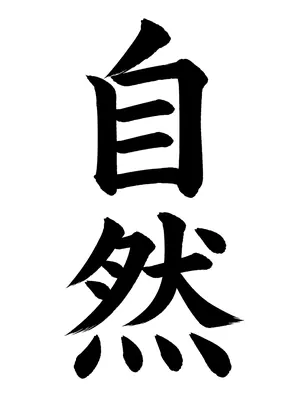 Nature自然 · shizen
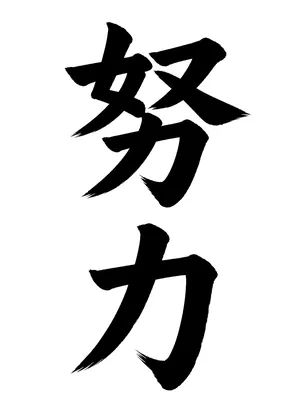 Effort努力 · doryoku
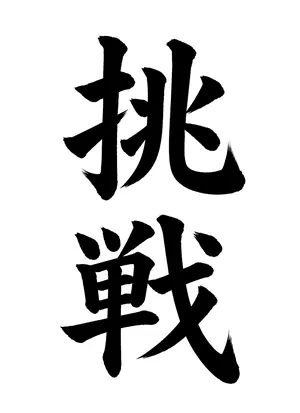 Challenge挑戦 · chōsen
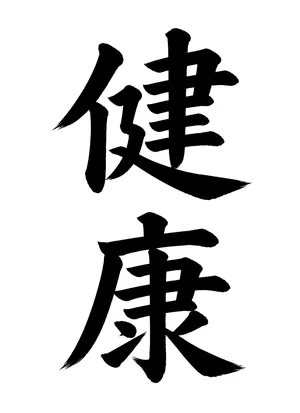 Health健康 · kenkō
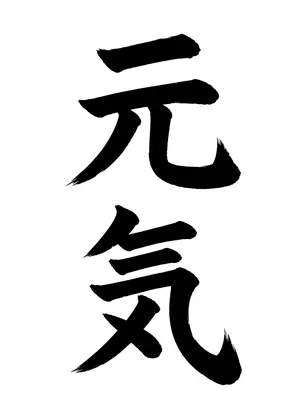 Energy元気 · genki
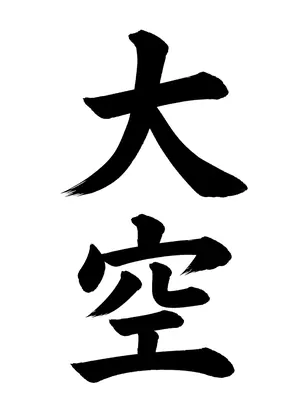 The Open Sky大空 · ōzora
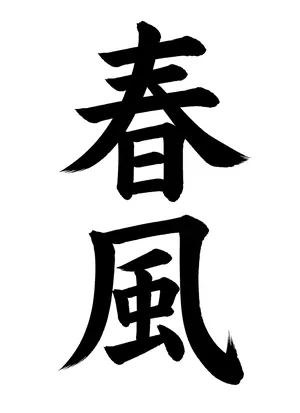 Spring Breeze春風 · harukaze
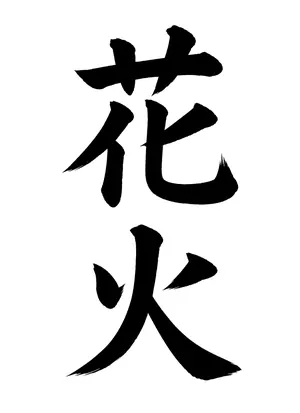 Fireworks花火 · hanabi
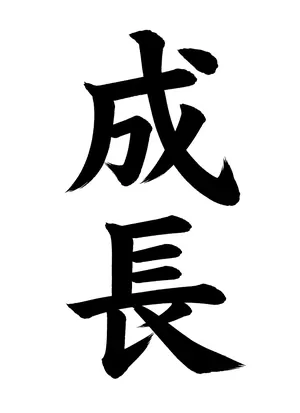 Growth成長 · seichō
Try it now
Your first full sheet.
Print the sheet for 平和 (heiwa, peace). Both characters use strokes you have already practiced. Fold a sheet of hanshi, write the word five times, compare each one with the model, and keep the best.
Questions
Which way does hanshi paper go, and where does each character sit?
Long side vertical. Japanese is written from top to bottom, so the first character goes in the upper half and the second in the lower half, each centered on the vertical center line, with margins at the top, bottom, and sides. Your name goes on the left, in the lower part, written smaller with the small brush.
How do I sign my name on Japanese calligraphy?
With the small brush, in a single vertical line on the left side of the sheet, starting a little below the level of the top of the second character. Names from other languages are usually written in katakana, the script Japanese uses for foreign words: Emily, for example, would usually sign as エミリー. Look up the spelling, or ask a Japanese speaker, and practice with a pencil first. Or sign in the Latin alphabet in small, neat letters, as many adults outside Japan do.
Which word should I write first?
大空 (ozora, the open sky) or 平和 (heiwa, peace). Both use the characters and strokes you have already practiced. 元気 and 花火 also have few strokes. Save words with many strokes, like 感謝 and 笑顔, for later.