In short
- Sit square to the paper, back straight, a fist’s width from the table.
- Hold the brush upright, around the middle of the handle, with a little space inside your hand.
- Move from your arm and shoulder, not your fingers. Wrist and elbow stay off the table.
How to sit
- Back straight, feet flat
Feet flat on the floor, about hip-width apart.
- A fist’s width from the table
Leave a space about the width of a fist between your stomach and the edge of the table.
- Square your body to the paper
The paper sits straight in front of you, not off to one side.
- Drop your shoulders
If they rise toward your ears, take a slow breath and let them fall.
- Rest your free hand on the paper
Lightly, at the lower left corner if you write with your right hand. It keeps the paper still and balances your body.
- Look down at the paper from above
Lean forward slightly from the hips rather than curving your back, so you see the paper from above, not from the side.
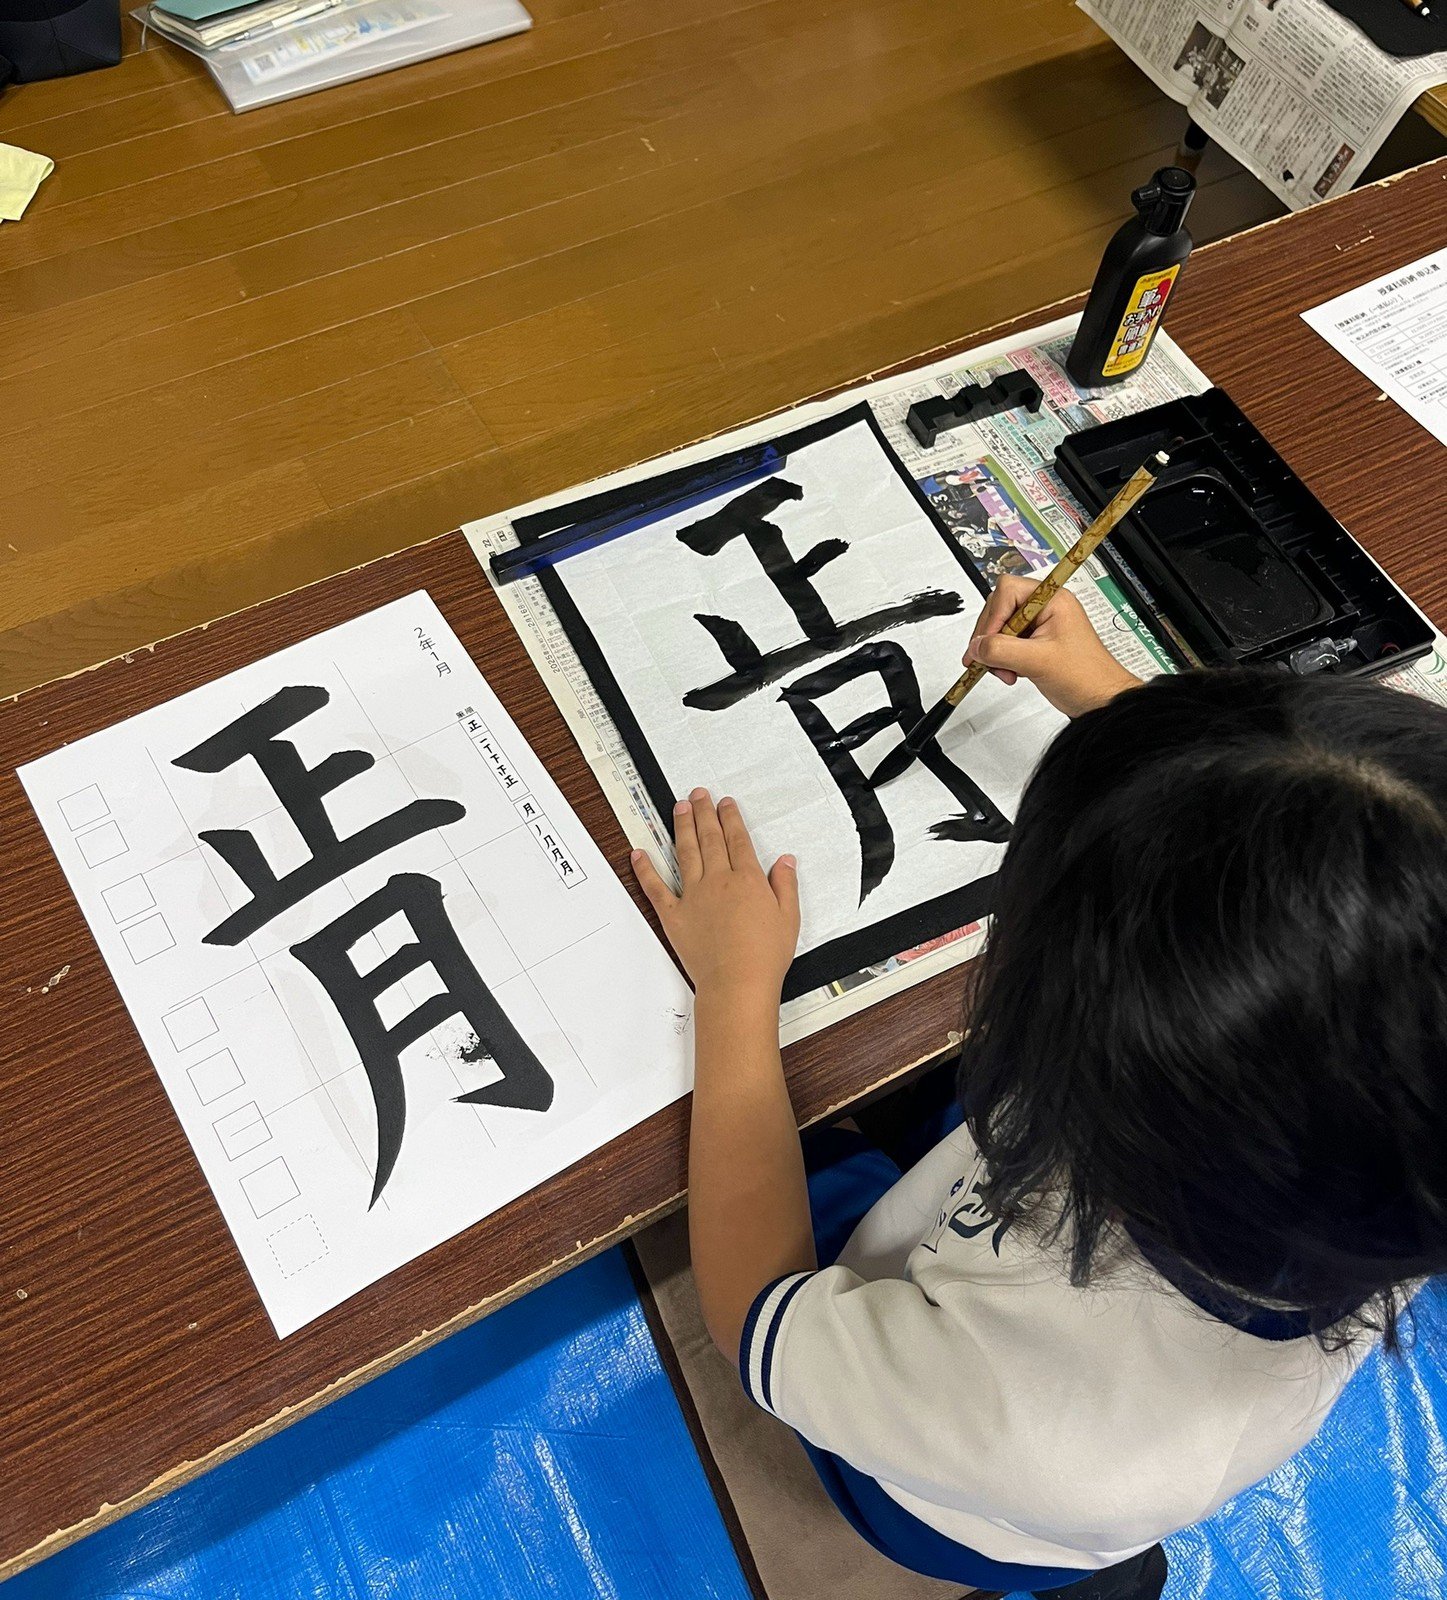
A student in our class: model on the left, free hand resting on the paper, looking down from above.
How to hold the brush
There are two common holds. Both keep the brush upright, and both let the movement come from your arm.
One-finger hold単鉤法tankoho
Thumb and index finger hold the brush, and the middle finger supports the handle from behind. It is close to a pencil grip, but the brush stands straight up instead of leaning.
Many beginners find it natural. Good for small characters and for writing your name with a small brush.
Two-finger hold双鉤法sokoho
Thumb on one side, index and middle fingers together on the other side, and the ring finger supporting from behind.
Two fingers in front give a firmer grip, which helps when you write large characters with a large brush.
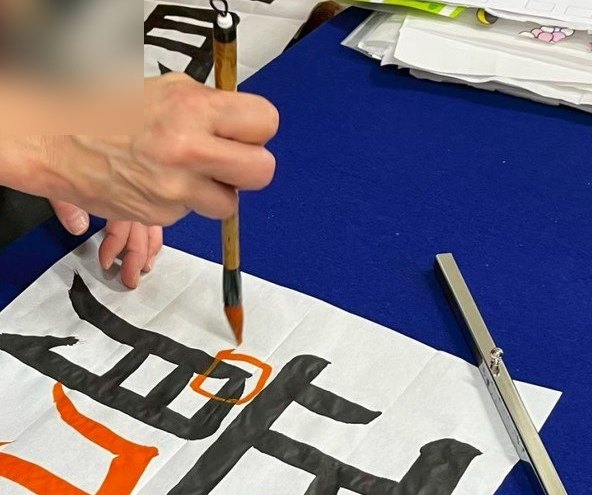
Check yourself
- The brush stands upright, pointing straight down at the paper. Imagine a string pulling the top of the handle toward the ceiling.
- You hold the handle around the middle, not down near the hair. Holding too low hides the tip and pushes you into small, cramped finger movements.
- There is a little space inside your hand, as if you were holding an egg. Do not squeeze.
- Your wrist and elbow are off the table when you write with the large brush. Your arm floats, and the whole arm moves the brush.
Common mistakes
Holding the brush low, near the hair. You cannot see the tip, and your fingers do cramped little movements.
Hold the handle around the middle, and let the arm do the moving.
Resting the wrist or elbow on the table while writing large characters.
Let the arm float. The elbow stays off the table.
Squeezing the handle. Lines come out shaky and tight.
Keep a little space inside your hand, as if holding an egg, and breathe out slowly as you write the stroke.
If you are left-handed
Japanese characters were developed by and for right-handed writers: horizontal strokes run left to right, and many strokes end with a sweep to the lower right. Traditionally, students in Japan were taught to write with the right hand. Today, attitudes are more relaxed, and teachers handle it in different ways.
You have two options. Learn to write with your right hand (many left-handed people find the large brush easier with the right hand than the pencil was, because the movement comes from the arm). Or write with your left hand and adjust: mirror the desk layout, angle the paper slightly if it helps, and pay extra attention to pulling, rather than pushing, the brush. Either choice is fine for a hobby. What matters most is that you enjoy practicing.
Try it now
Five lines in the air, then five on paper.
Sit, hold the brush, and write five long horizontal lines in the air, moving only your arm. Then print the sheet for 平和 (peace) and trace its long horizontal strokes, arm floating, brush upright.
Questions
How do you hold a Japanese calligraphy brush?
Upright, pointing straight down at the paper, held around the middle of the handle. Use the one-finger hold (thumb and index finger, middle finger behind) or the two-finger hold (index and middle fingers together in front, ring finger behind). Keep a little space inside your hand, and move the brush with your arm.
Should my elbow rest on the table?
Not when you write characters with the large brush. Keep the wrist and elbow off the table so the whole arm can move the brush. Shaky lines are often a sign that the elbow is resting or the fingers are doing the work.
Can I do Japanese calligraphy left-handed?
Yes. Either learn with your right hand, which many left-handed beginners find easier with a large brush than with a pencil, or write with your left hand and mirror the desk layout. For a hobby, either choice is fine.