In short
- Any flat, stable table at a comfortable height works, and a chair is fine.
- Newspaper first, felt pad and paper in front of you, inkstone above right, model to the left. Left-handed: reverse the sides.
- Pour only a little ink, keep a folded paper towel nearby, and have a place ready for finished sheets to dry.
- Newspaper
- Felt pad
- Hanshi
- Paperweight
- Inkstone
- Brush and brush rest
- Model
- Paper towel
- Scrap paper
Choose your place
- A flat, stable table at a comfortable height. A dining table works well.
- Good light, ideally from the side opposite your writing hand, so the shadow of your hand does not fall on the paper.
- Space for the paper, the inkstone, and the model, without crowding.
In Japan, people often write sitting on the floor in the formal kneeling position, seiza (正座). You do not need to. Sitting on a chair at a table is completely fine, and it is how most of our students at Kodomo School, in Toyohashi, practice.
Arrange your tools
The diagram shows a standard arrangement for a right-handed writer. If you write with your left hand, reverse the left and right sides.
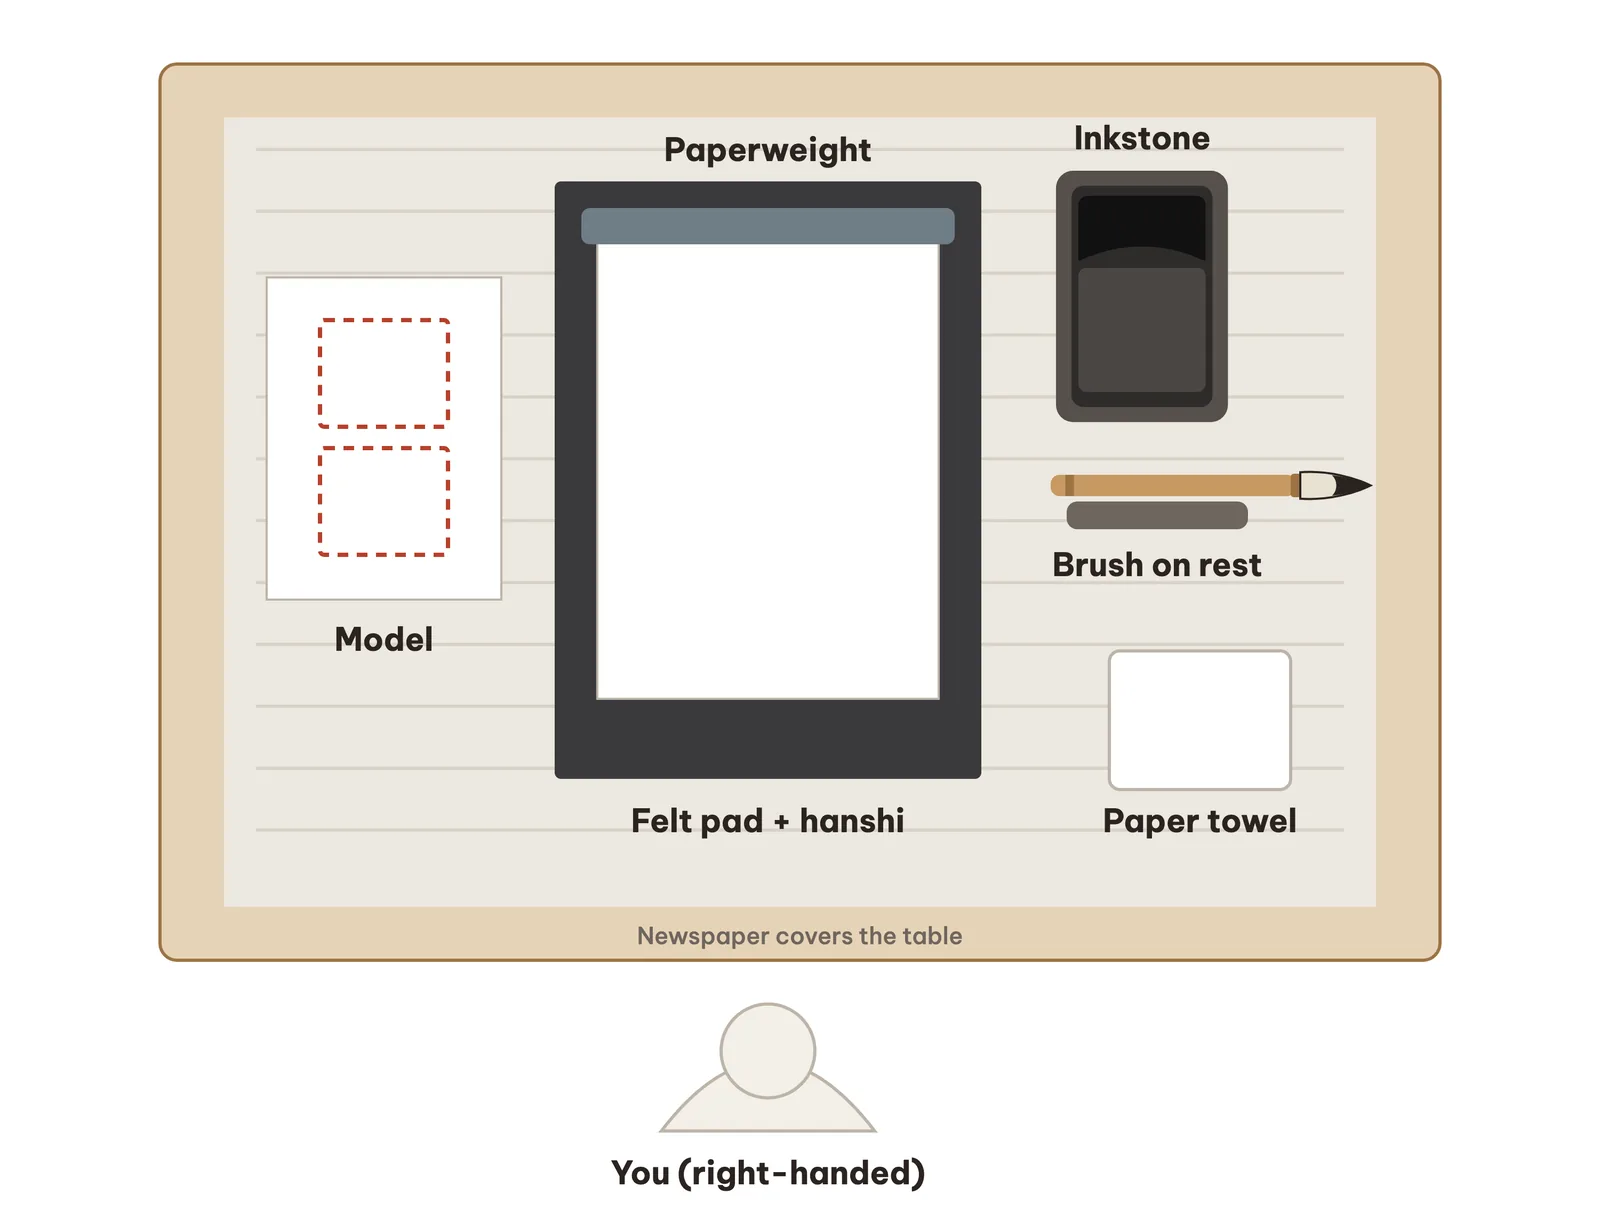
- Newspaper first
Cover the area where you will work.
- The felt pad in the center
Directly in front of you.
- A sheet of hanshi on the felt pad
Smooth side up, with the long side vertical.
- The paperweight across the top edge
So the paper does not move while you write.
- The inkstone above and to the right
Where your brush can reach it easily without crossing over the paper.
- The brush on its rest
Next to the inkstone.
- The model to the left of the paper
Where you can see it clearly, and as close to your writing paper as possible, so your eyes do not have to travel far.
- Extra hanshi and scrap paper within reach
But away from the ink.
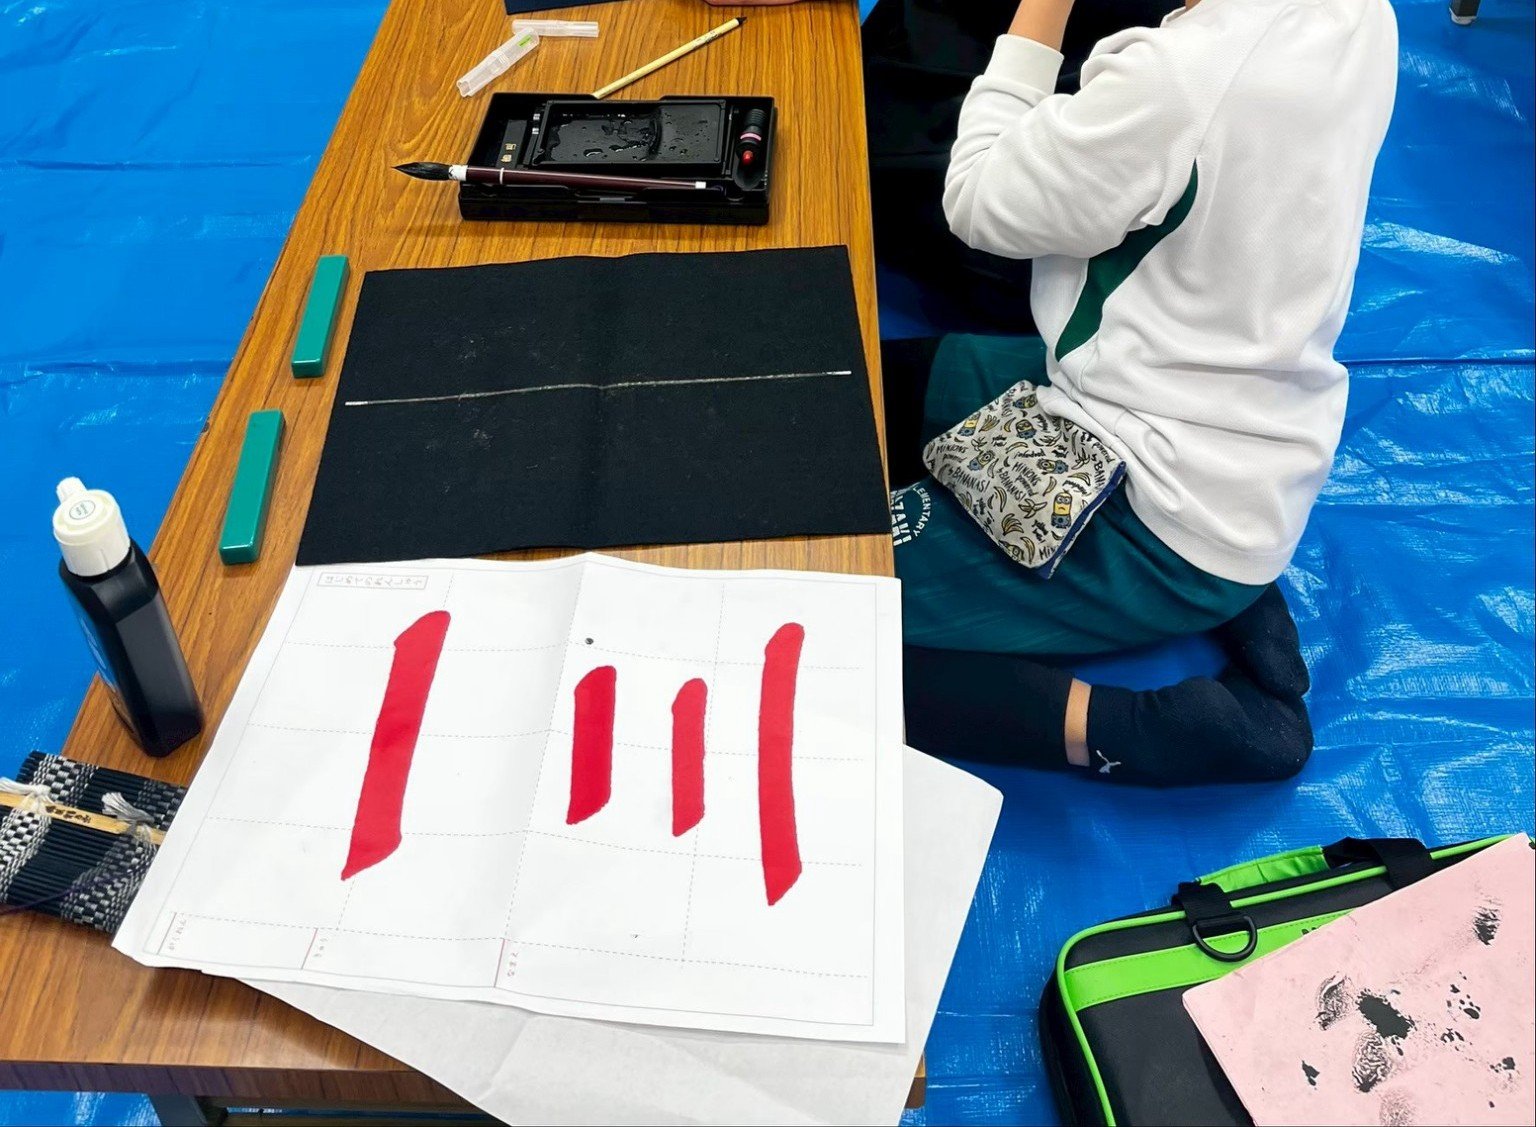
A desk in one of our classrooms. The model was written by a teacher in red ink.
Protecting the table and your clothes
Ink can stain wood, fabric, and carpets. Cover the table with newspaper or a plastic sheet, and wear old clothes or an apron.
Keep a folded paper towel nearby for small drips, and have a place ready to lay finished sheets to dry, such as a few sheets of newspaper on the floor or another table.
Common mistakes
Light from the same side as your writing hand, so your hand shadows the paper.
Light from the side opposite your writing hand, so the shadow does not fall on the paper.
The inkstone where your brush has to cross over the paper to reach it.
The inkstone above and to the right, within easy reach of the brush.
Filling the inkstone before you are ready to write.
Pour ink only when you are ready to write, and only a little at a time.
Before you start
- Table covered, old clothes or apron on.
- Tools arranged: felt pad, paper, paperweight, inkstone, brush, model.
- A little ink poured into the sea of the inkstone (see ink and loading the brush).
- Back straight, a fist’s width from the table, shoulders relaxed (see posture and how to hold the brush).
Try it now
Set the desk once, then write one word.
Lay out your tools as in the diagram, model on the left, close to the paper. Then print the sheet for 元気 (genki) and write it.
Questions
Do I have to kneel on the floor (seiza) for Japanese calligraphy?
No. Sitting on a chair at a flat, stable table is completely fine, and it is how most of our students practice.
Where do the inkstone and the model go on the desk?
For a right-handed writer, the inkstone goes above and to the right of the paper, with the brush on its rest beside it, and the model to the left, as close to the paper as possible. Left-handed writers reverse the sides.
How do I keep calligraphy ink off my table and clothes?
Cover the table with newspaper or a plastic sheet, wear old clothes or an apron, and pour only a little ink, only when you are ready to write. Keep a folded paper towel nearby for drips.