In short
- The four treasures are the brush, the ink, the inkstone, and the paper. Add a felt pad and a paperweight.
- Start with bottled ink made for calligraphy, one large brush, and a big pack of hanshi paper. A beginner set covers most of it.
- No ink yet? Our students begin with a pencil, then a brush pen, then a brush dipped in water.
The four treasures
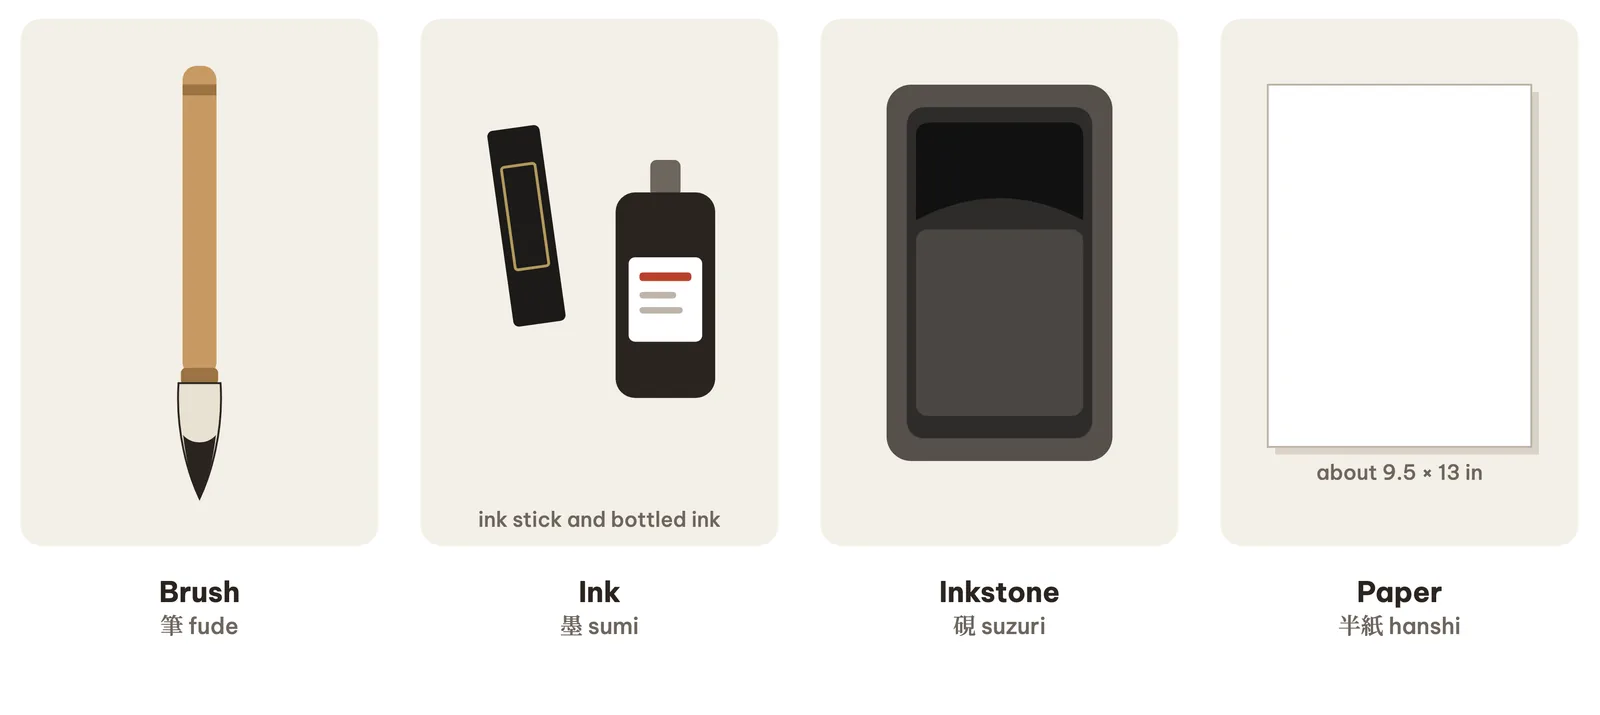
In China and Japan, the four basic tools of writing have a lovely name: bunbo shiho 文房四宝, “the four treasures of the study.”
The brush筆fude
Animal hair set into a bamboo or wooden handle. The hair comes to a fine point, so one brush writes both thick and thin lines.
You need one large brush (futofude, 太筆) for characters, and later one small brush (kofude, 小筆) for your name. See choosing your first brush.
The ink墨sumi
Traditional ink is a solid stick of soot and animal glue, rubbed with a little water on an inkstone. Grinding is slow, quiet, and pleasant.
Most beginners, and most Japanese schoolchildren, use bottled liquid ink, bokuju (墨汁). Start there; try grinding a stick later, once you are comfortable with the brush.
The inkstone硯suzuri
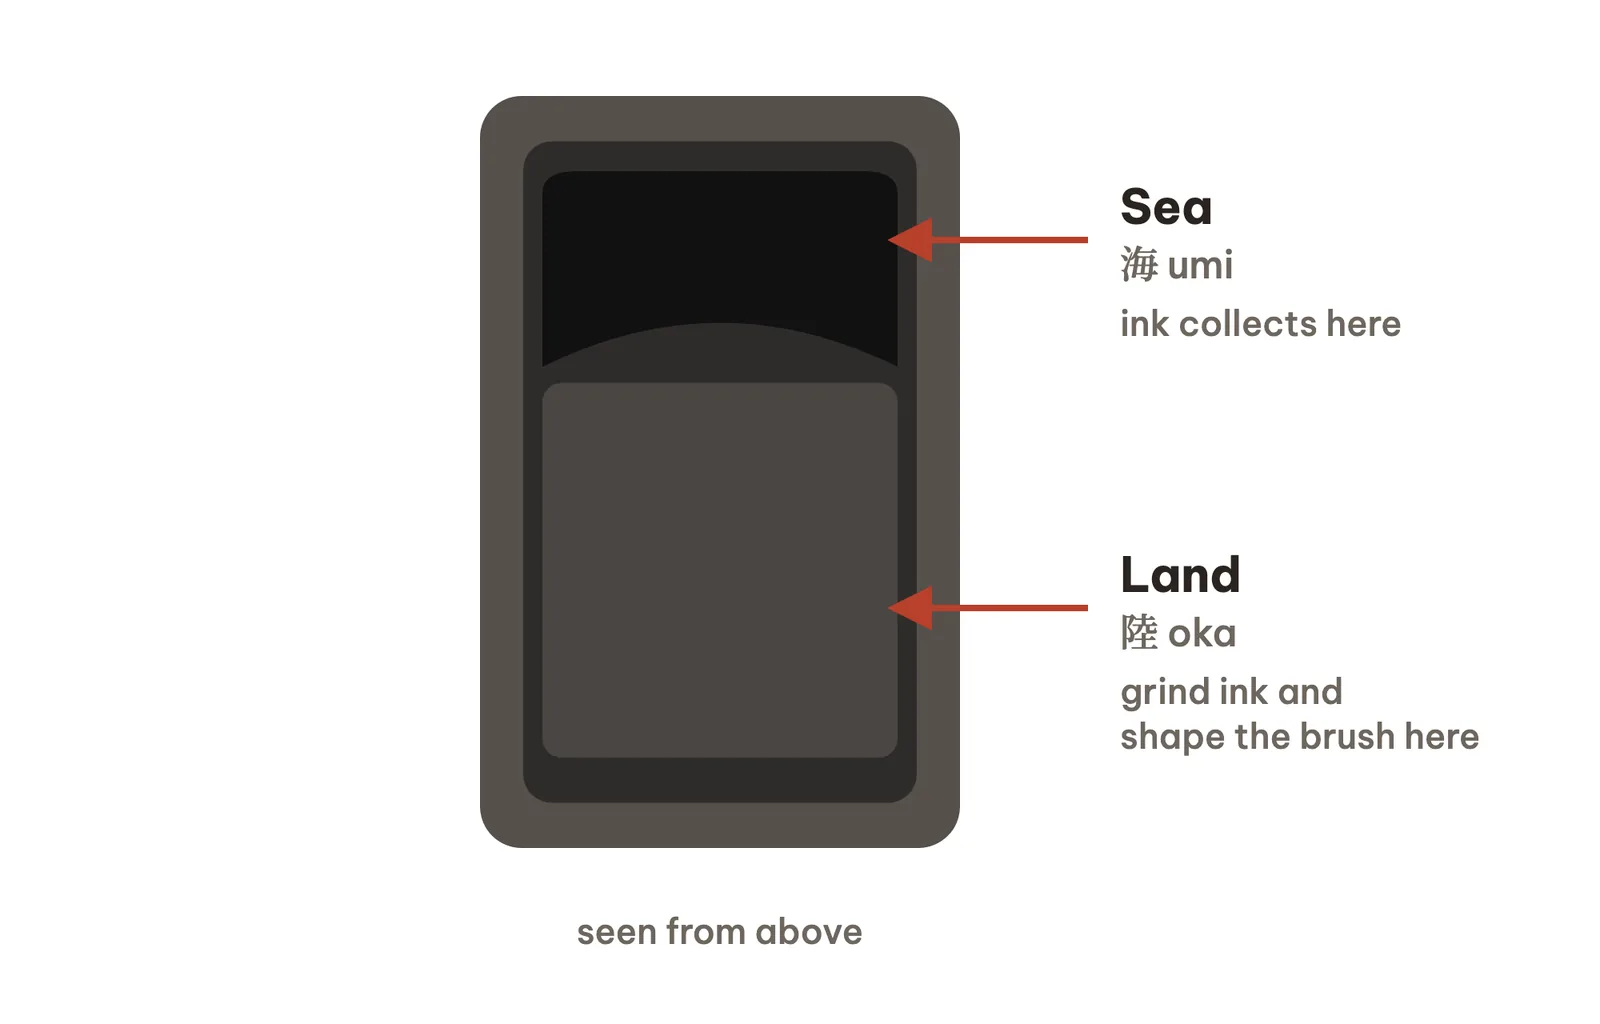
A flat stone with a gently sloping surface and a deeper well at one end. With bottled ink it becomes a dish: pour a little into the well, and use the flat part to adjust the ink on your brush.
A light plastic inkstone works fine with bottled ink; many beginner sets include one. A small ceramic dish is acceptable at the very beginning.
The paper半紙hanshi
The standard practice paper in Japan: about 24 by 33 centimeters (roughly 9.5 by 13 inches), thin and absorbent, smoother on one side. Write on the smooth side.
Hanshi soaks up ink quickly and shows every movement of the brush. Printer paper does not absorb ink the same way. You will use many sheets, so buy a large pack.
The land and the sea
The flat part of an inkstone is called the “land” (oka, 陸), and the well is called the “sea” (umi, 海). When you grind an ink stick, you rub it on the land, and the ink flows down into the sea.
The helpers
A few simple extras make practice cleaner and easier.
- A felt pad (shitajiki, 下敷き) goes under the paper. It absorbs extra ink, gives the brush a soft surface, and protects your table. Many have faint grid lines to help you place characters.
- A paperweight (bunchin, 文鎮) is a heavy bar across the top of the paper so it does not move.
- A brush rest (fudeoki, 筆置き) keeps a wet brush from rolling across your table.
- Newspaper or scrap paper, for covering your table, testing the brush, and wiping off extra ink.
- A water dropper or a small cup of water, if you grind ink.
- An old towel or paper towels, and clothes you do not mind getting ink on.
Many shops sell beginner sets with a brush, ink, an inkstone, a felt pad, and a paperweight in one box. You only need to add a pack of hanshi.
Start without ink
At our school, Kodomo School, in Toyohashi, children do not begin with a big brush and a bottle of black ink. They move step by step, and each step adds one new challenge. Adults can use the same path, with much less worry about mess and wasted paper.
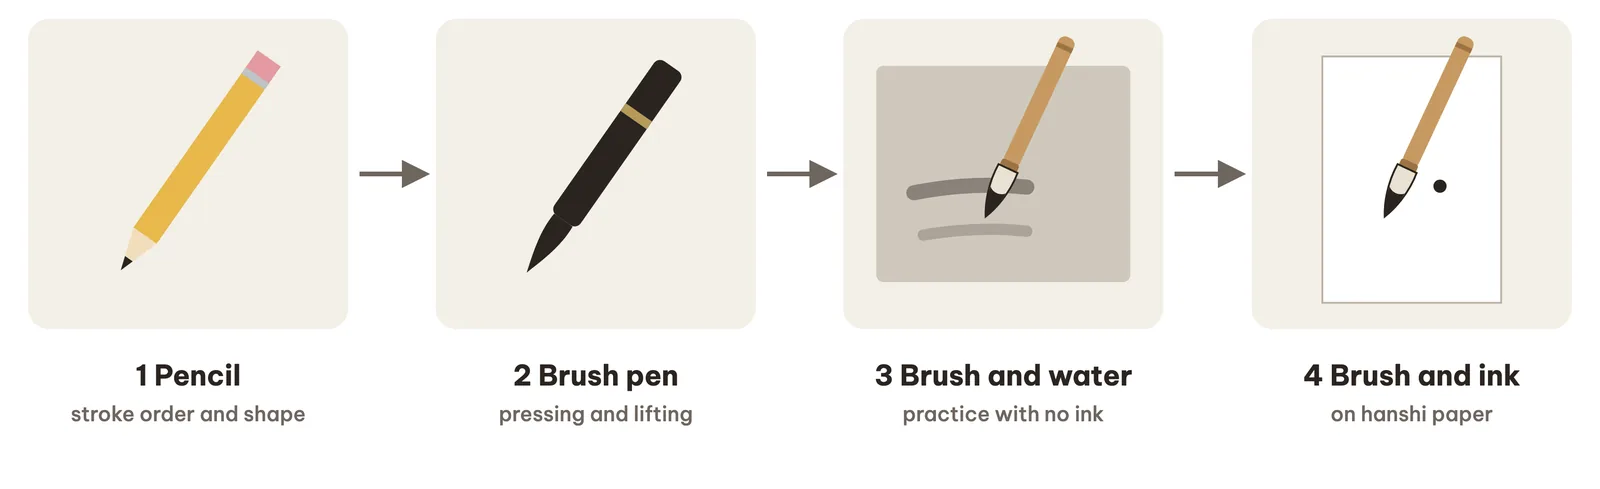
- Pencil
Learn the order and direction of the strokes and the basic shape of a character without thinking about ink. Copy a model slowly with a soft pencil, watching where each stroke begins and ends. Japanese children spend years writing with a pencil before and alongside the brush.
- Brush pen
A fudepen (筆ペン) has a flexible tip that behaves a little like a real brush: press harder and the line thickens, lift and it thins. Choose real bristles or soft, flexible fibers, not a hard felt tip. It teaches your hand the idea of pressing and lifting, on ordinary paper.
- Brush and water
Water-writing cloth or paper (mizu shodo, 水書道) turns dark wherever it gets wet. Write on it with your real brush dipped in plain water, as many times as you like; the strokes fade as they dry. Good for posture, the hold, and the basic strokes, though it does not absorb water exactly the way hanshi absorbs ink.
- Brush and ink on hanshi
Set up your desk and write with real ink. Now you see every detail: how much ink you loaded, how fast you moved, how firmly you pressed. You already know the stroke order, so you can focus completely on the brush.
Shopping checklist
- Large brush: mixed hair or medium firmness, hair about 1/2 inch thick
- Bottled sumi ink for calligraphy
- Hanshi paper, 100 sheets or more
- Felt pad, a little larger than a sheet of hanshi
- Inkstone, or a small dish to start
- Paperweight, or a heavy flat object
- Newspaper or scrap paper, and paper towels
- Later: a small brush for your name
- Optional: a brush pen and a water-writing cloth
Try it now
Start with a pencil today, then choose your brush.
Print a free sheet written by our teachers and copy it slowly with a soft pencil. Then read how to choose your first brush, and where to buy in the U.S.
Questions
What tools do you need for Japanese calligraphy?
Four basic tools: a brush, ink, an inkstone, and paper, plus a felt pad under the paper and a paperweight on top. Many shops sell beginner sets with everything but the hanshi paper.
Can I use India ink or printer paper?
Better not. India ink and drawing inks can be thinner, glossier, or waterproof, and harder to clean from a brush; look for “sumi,” “bokuju,” or “calligraphy” on the label. Printer paper does not absorb ink like hanshi.
Can I practice Japanese calligraphy without ink?
Yes. Our students begin with a pencil, then a brush pen, then a real brush dipped in water on a water-writing cloth. Only then do they write with ink on hanshi.